Table of Contents
With Custom iFrame, you can embed Google Form in Elementor easily. Collect feedback, surveys, or registrations directly on your WordPress website.
Not a fan of reading? No worries — we’ve got a video tutorial for you. 📺

Not a video person? No worries — scroll on for the full step-by-step guide.
Step 1: Get the Google Form Link
- Open your Google Form that you want to embed.
- On the top right corner, click on ‘Publish’ button. (A Publish Form popup will be opened.)
- Click on “Publish”. Now again click on ‘Published’ button. > Click on ‘Copy Responder Link’
- Copy the generated link – your Google Form is now published and ready to embed in your WordPress site.
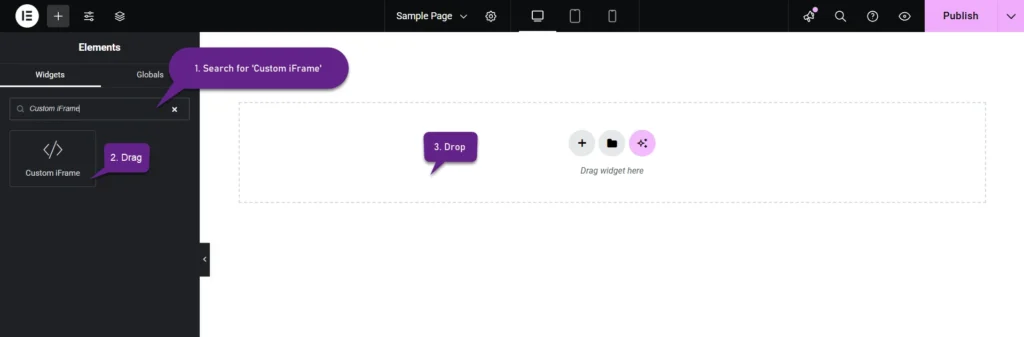
Step 2: Add the Custom iFrame Widget
- Install and Activate Custom iFrame Plugin
- Open your page in Elementor Editor.
- Drag and drop the Custom iFrame Widget onto your page.
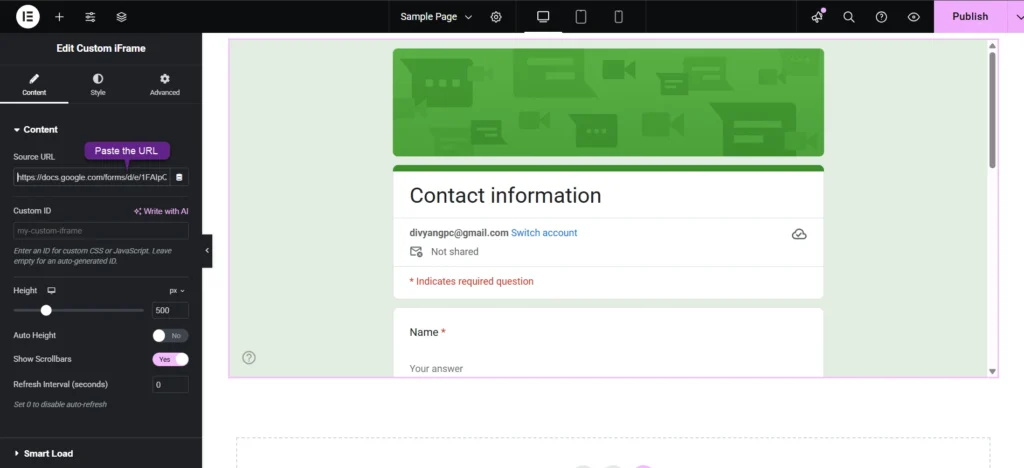
Step 3: Embed Google Form in Elementor
- Go to Content
- Paste the Google Form URL into Source URL field.
Step 4: Customize & Configure Settings
For styling, smart loading, and advanced options, refer to our Complete Custom iFrame Widget Guide to fine-tune your Google Form embed in Elementor.
Step 5: Save & Publish
Click Update, and your Google Slide is now live on your page!
Make data collection seamless with Embed Google Form in Elementor. Engage your audience and gather responses effortlessly! 📝🚀