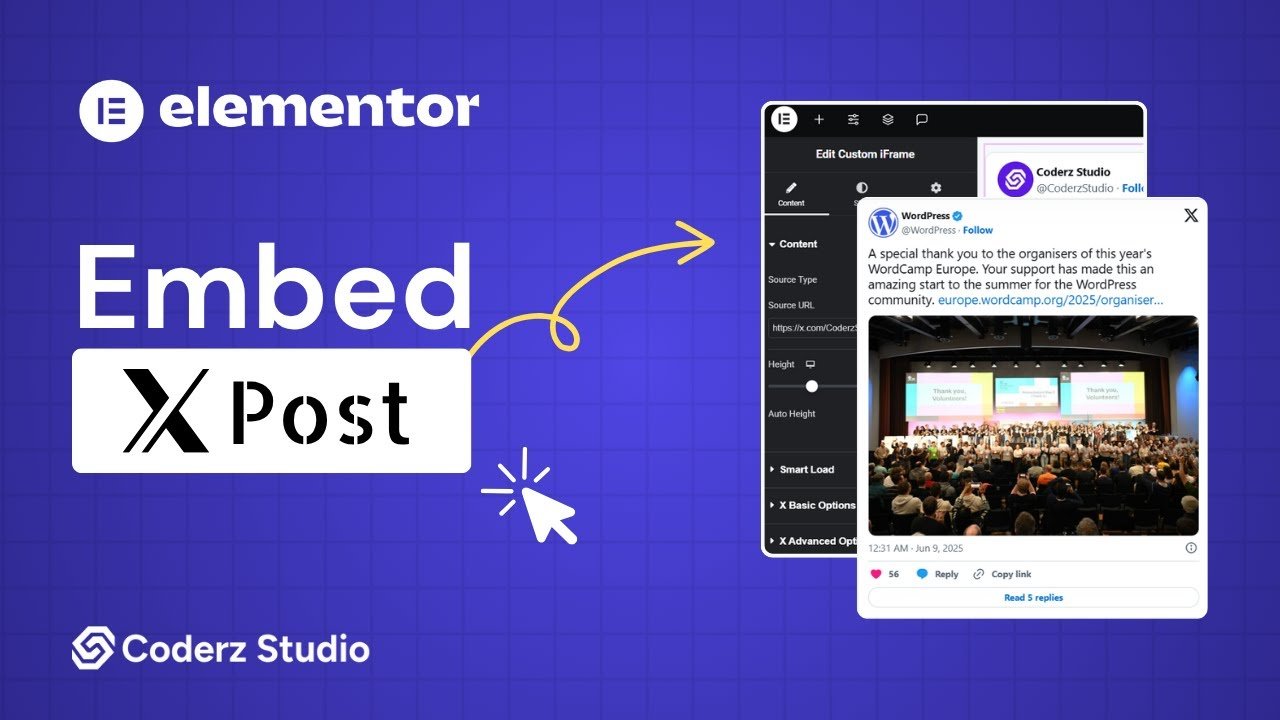
With the Custom iFrame plugin, you can easily embed X post in Elementor WordPress site without any API key. Share updates, trends, or important discussions from X directly on your website. Follow these steps to display a X Post on your website.
Not a fan of reading? No worries, we’ve got a video tutorial for you. 📺
Not a video person? No worries, scroll on for the full step-by-step guide.
Step 1: Get the X Post Link
- Open X (https://x.com/).
- Login or Register to X. (optional)
- Navigate to the post you want to embed.
- Click the ‘Share‘ icon of the post > Click on ‘Copy link’ button.
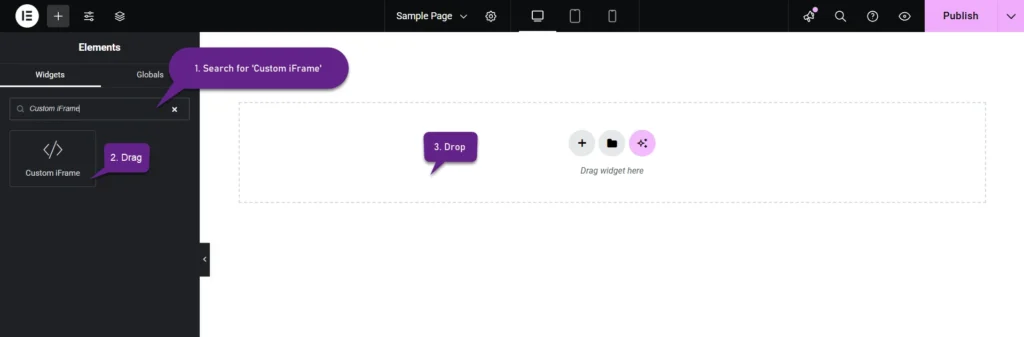
Step 2: Add the Custom iFrame Widget
- Install and Activate Custom iFrame Plugin
- Open your page in Elementor Editor.
- Drag and drop the Custom iFrame Widget onto your page.
Step 3: Embed X Post In Elementor
- Go to Content > In Source Type, select X (Formerly Twitter)
- Paste the X Post URL into Source URL field.
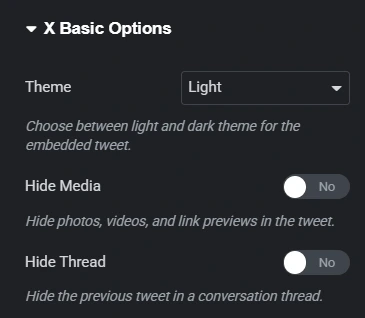
Step 4: Configure X Basic Options
In source field, once you’ve selected X (formerly Twitter) post, you’ll see a section called X Basic Options.
This gives you control over how the embedded tweet appears on your page.
- Theme: Switch between Light and Dark modes to match your site style.
- Hide Media: Toggle ON to hide images, videos, and link previews.
- Hide Thread: Toggle ON to remove previous tweets in a conversation.
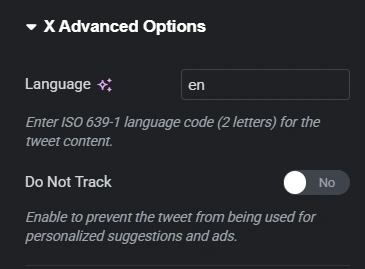
Step 5: Configure X Advanced Options
These settings offer a bit more control over your embedded tweet:
Language:
Set the tweet’s language using a 2-letter ISO 639-1 code (e.g., en for English, fr for French).
Do Not Track:
Enable this to prevent X from showing personalized ads or suggestions based on the embed.
Step 6: Customize Style Settings & Publish
For styling, smart loading, and advanced options, refer to our Complete Custom iFrame Widget Guide to fine-tune your embed.
Click Update, and your X post is now live on your page!
Embed X post in Elementor via simple way with the Custom iFrame plugin. Keep your audience informed and engaged with live X posts. Let your website showcase X conversations and trending content!