With Custom iFrame, you can embed X Post in WordPress and display live tweets, announcements, or social proof directly on any page or post in the Gutenberg block editor.
Quick Summary
Step-by-step guide to embed an X Post in WordPress
1. Copy the X Post link from X.
2. Install and activate the Custom iFrame plugin.
3. Open your page in the Gutenberg block editor and add the Custom iFrame block.
4. Paste the X Post link into the Source field.
5. Adjust settings and customize the display.
6. Save and publish your page.
Step 1: Get the X Post Link
- Open X.
- Log in or register to X. This step is optional. You can browse public posts without an account.
- Navigate to the post you want to embed.
- Click the Share icon on the post, then click Copy link.
You now have the X Post link copied to your clipboard.
Step 2: Install the Custom iFrame Plugin and Add the Block
- Go to your WordPress dashboard.
- Navigate to Plugins, then Add New.
- Search for “Custom iFrame by Coderz Studio” and press enter.
- Click Install Now, then click Activate.
- Open your page in the Gutenberg block editor.
- Click the Add Block button and search for Custom iFrame.
- Click the Custom iFrame block to add it to the page.
Step 3: Embed X Post in WordPress
- Select the Custom iFrame block on your page.
- In the Source field, paste the X Post link you copied in Step 1.
Your X Post will load as an iframe inside the Gutenberg editor immediately.
Step 4: Adjust Settings & Publish
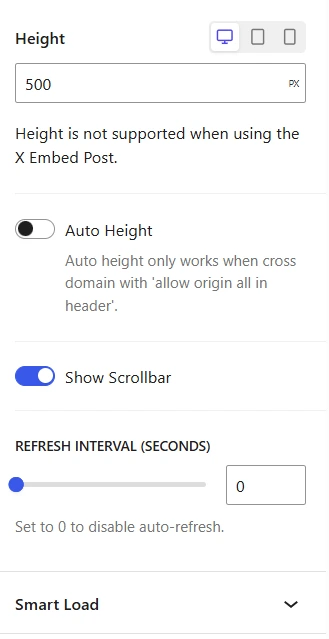
Once the X Post is embedded, you can configure the display settings in the Gutenberg block panel.
Height: Set the iframe height to fit the post and your page layout.
Scroll Bar: Enable or disable the scrollbar inside the embedded content.
Refresh Interval: Set how often the iframe refreshes. Useful if the post content updates or you are embedding live thread activity.
Smart Load: Enable lazy loading so the iframe loads only when it enters the viewport. This helps keep your page performance strong.
Want to add a custom watermark, device frame, or full screen button? Check out the advanced options in our Complete Custom iFrame for Gutenberg Guide.
Update or Publish the page. Your X Post is now live on your WordPress site.
This guide showed you how to embed an X Post in WordPress using the Custom iFrame plugin. From copying the post link to configuring the iframe and publishing, the whole setup takes only a few minutes.