- Step 1: Get the YouTube Video Link
- Step 2: Add the Custom iFrame Widget
- Step 3: Embed YouTube Video in Elementor
- Step 4: Configure Basic Options
- Step 5: Configure YouTube Playback Options
- Step 6: Configure YouTube Appearance Options
- Step 7: Configure YouTube Captions Options
- Step 8: Configure YouTube Advanced Options
- Step 9: Save & Publish
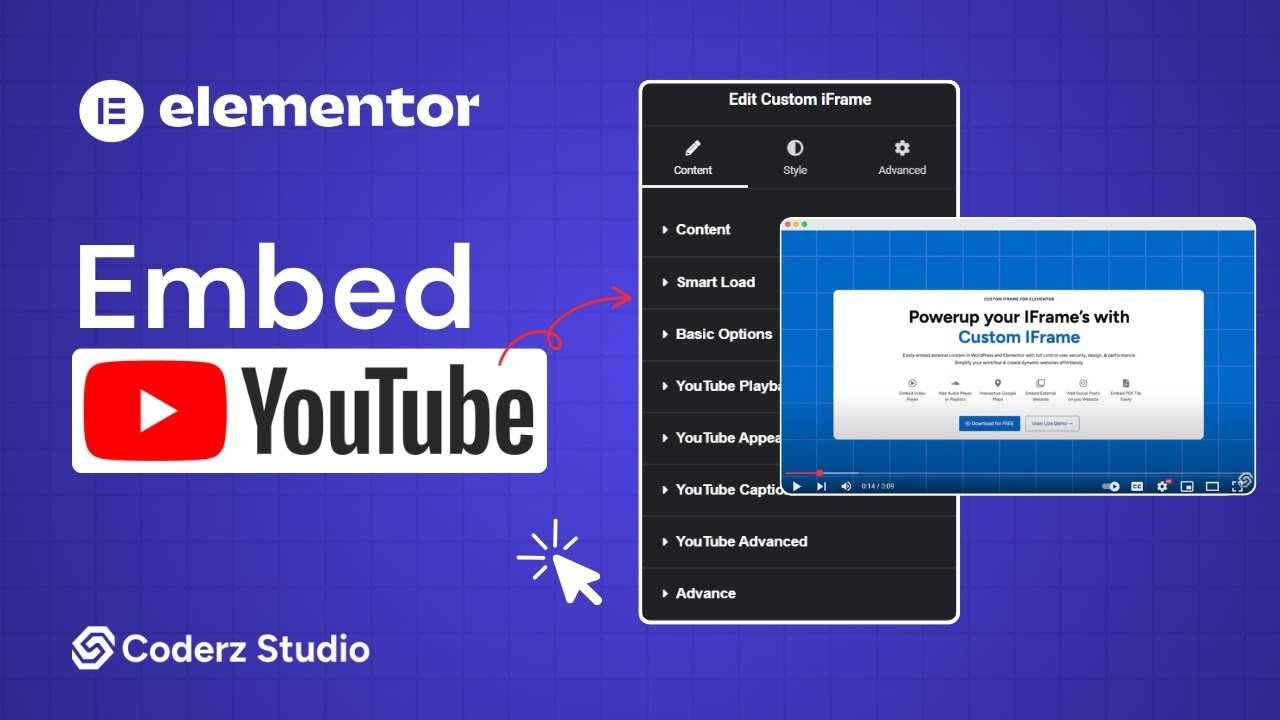
With the Custom iFrame plugin, you can embed YouTube video in Elementor easily. Show tutorials, product demos, or any YouTube video to make your website more engaging.
Follow these steps to display a YouTube video on your website.
Not a fan of reading? No worries — we’ve got a video tutorial for you. 📺
Not a video person? No worries — scroll on for the full step-by-step guide.
Step 1: Get the YouTube Video Link
- Open YouTube (https://www.youtube.com/).
- Navigate to the particular video you want to embed.
- Click the ‘Share‘ button of the video > Click on ‘Copy’ button.
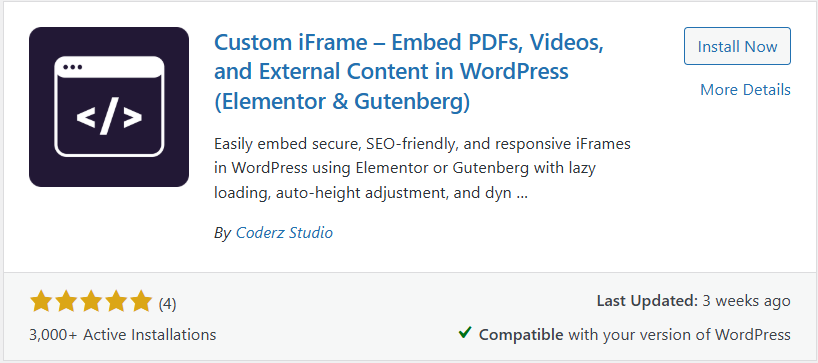
Step 2: Add the Custom iFrame Widget
- Install and Activate Custom iFrame Plugin
- Open your page in Elementor Editor.
- Search for Custom iFrame and Drag and drop the Widget onto editor area.
Step 3: Embed YouTube Video in Elementor
- Go to Content > In Source Type, select YouTube.
- Into Source URL field, paste the YouTube video URL.
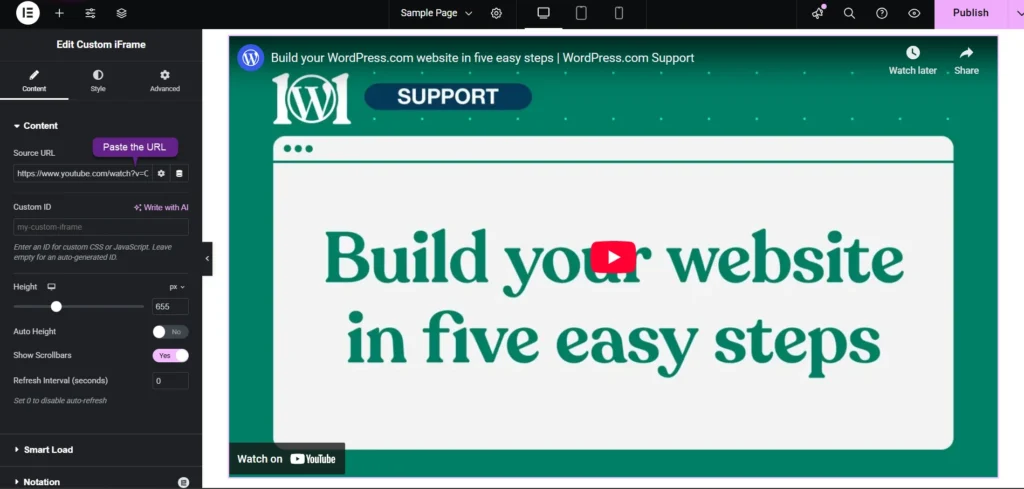
In source field, once you’ve selected YouTube, you’ll see all the following sections.
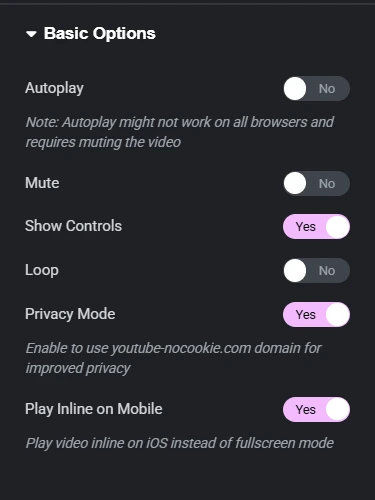
Step 4: Configure Basic Options
This gives you control over how the embedded YouTube video behaves on your page.
- Autoplay: Turn ON to start video automatically (mute required on most browsers). Use when you want the video to play without user action.
- Mute: Turn ON to silence the video by default. Use with autoplay or for silent background videos.
- Show Controls: Turn ON to display play, pause, and volume controls. Use when viewers need control over playback.
- Loop: Turn ON to play the video on repeat. Use for background loops or short demos.
- Privacy Mode: Turn ON to use youtube-nocookie.com for better privacy. Use when you don’t want to track viewers via cookies.
- Play Inline on Mobile: Turn ON to play video inside the page on iOS. Use to avoid full-screen takeover on iPhones/iPads.
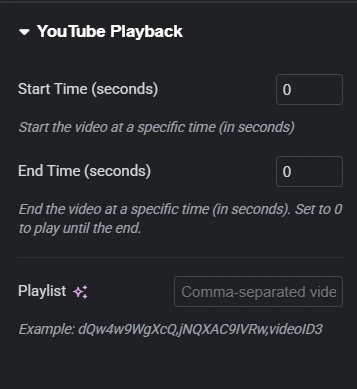
Step 5: Configure YouTube Playback Options
This lets you control when the video starts, ends, or plays as part of a playlist.
- Start Time (seconds): Set when the video should begin playing. Use to skip intros or start from a key moment.
- End Time (seconds): Set when the video should stop playing. Use to cut off outros or limit the clip duration.
- Playlist: Add video IDs separated by commas to create a playlist. Use to play multiple videos in sequence.
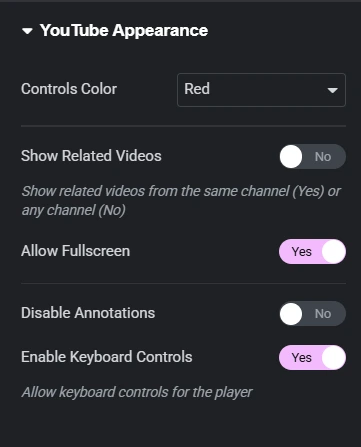
Step 6: Configure YouTube Appearance Options
These let you control how the video player looks and behaves for users.
- Controls Color: Choose Red or White for the progress bar color. Use to match your site’s color theme.
- Show Related Videos: Show related videos from same channel (Yes) or any channel (No). Use to keep viewers on your content.
- Allow Fullscreen: Allow users to expand the video to fullscreen. Use to give viewers better visibility.
- Disable Annotations: Turn ON to hide video annotations. Use to remove pop-ups or distractions in the video.
- Enable Keyboard Controls: Let users control the video using their keyboard. Use for better accessibility and user experience.
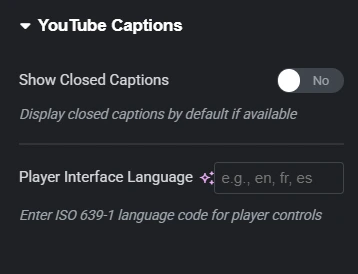
Step 7: Configure YouTube Captions Options
This controls caption settings and player language display.
- Show Closed Captions: Turn ON to display captions by default if available. Use to improve accessibility or reach a wider audience.
- Player Interface Language: Enter a language code like en, fr, or es for player controls. Use to match the video player’s language to your audience.
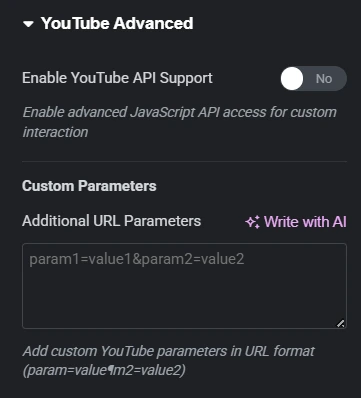
Step 8: Configure YouTube Advanced Options
This section is for developers needing more control or customization.
- Enable YouTube API Support: Turn ON to allow advanced interaction using JavaScript API. Use for custom player controls or tracking events.
- Additional URL Parameters: Add custom YouTube parameters in param=value format. Use to fine-tune playback behavior like quality, captions, or autoplay.
Step 9: Save & Publish
Click Update, and your interactive YouTube video is now live on your page!
You’re all set! With Custom iFrame, you can embed YouTube video in Elementor easily. Keep visitors interested by adding YouTube videos to your site. Make your website more interactive and let it do the streaming for you!