If you embed external content using an iframe, chances are you also want branding.
A logo. A name. A subtle “hey, this is ours”. That’s exactly what the Watermark feature in Custom iFrame is built for.
This guide shows you how to add a text or image watermark to embedded iframe in Elementor, step by step.
Quick Overview
- Install and activate Custom iFrame Free and Custom iFrame Pro.
- Open your page in Elementor and drag the Custom iFrame widget onto the page.
- Paste your external page URL into the Source field.
- Enable Watermark and choose Text or Image.
- Switch to the Style tab and adjust the watermark to match your branding.
What Does the Watermark Actually Do?
Before we click anything, here’s what’s happening behind the scenes:
- The watermark is added on top of the iframe
- It does not modify the embedded website
- It works as a branding overlay
This means:
- Your logo or text stays visible
- The embedded content remains untouched
- No cross-domain or security issues (yep, browsers are picky)
Perfect for:
- Brand protection
- White-label demos
- Client previews
- Embedded dashboards
- Reports and PDFs inside iframes
Step 1: Add Custom iFrame Widget in Elementor
- Install Custom iFrame Free and Custom iFrame Pro Plugins in WordPress.
- Edit the page with Elementor in which you want to add iframe.
- Drag the Custom iFrame widget onto the page
- In source URL field, paste your external content URL.
At this point, your iframe is live. Now let’s add watermark and brand it.
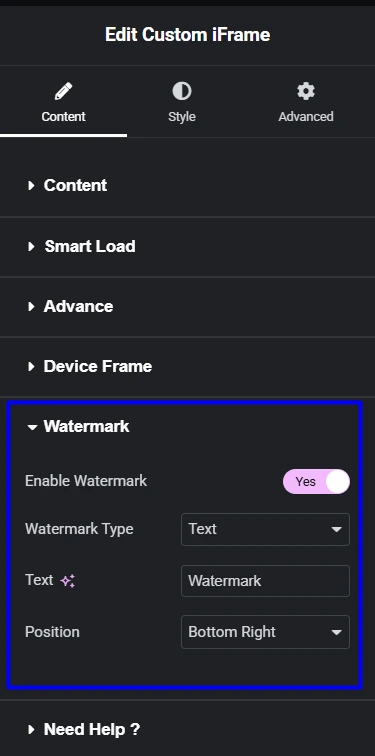
Step 2: Add Watermark to Embedded iframe
- Go to the Content tab
- Scroll down to Watermark
- Toggle Enable Watermark → Yes
Once enabled, more options appear instantly.
Step 3: Choose Watermark Type (Text or Image)
You have two branding options.
Option 1: Text Watermark
Best for:
- Website name
- Product name
- “Powered by …” branding
Steps:
- Set Watermark Type → Text
- Enter your text (for example: Coderz Studio)
- Choose the Position (Top Left, Top Right, Bottom Left, Bottom Right)
Option 2: Image Watermark
Best for:
- Logos
- Brand marks
- Custom icons
Steps:
- Set Watermark Type → Image
- Upload or select your logo
- Choose the Position
This is ideal if you want visual branding without text clutter.
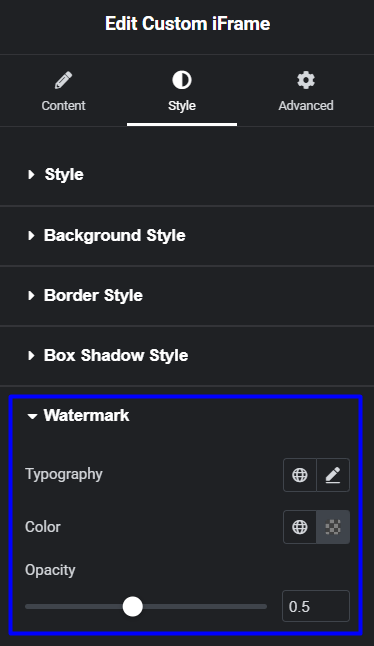
Step 4: Style the Watermark
Now let’s make it look good.
- Switch to the Style tab
- Open the Watermark section
Here you can control:
Typography (Text Only)
- Font family
- Font size
- Font weight
Color
- Pick any color
- Match your brand palette
Opacity
- Control visibility
- Keep it subtle or bold
This guide walked you through how to add and customize a watermark using the Custom iFrame Pro plugin in Elementor.
From enabling text or image watermarks to adjusting style and opacity, you now have full control over iframe branding. Set it up based on your branding needs to keep your embeds professional, protected, and clearly yours.